
Magic Nodes is an extension to allow node-compositing inside of After Effects. This documentation provides information on how Magic Nodes works and a complete description of each of its features.
Version 2.0.0. Magic Nodes is compatible starting from After Effects 2017 (Windows and Mac).
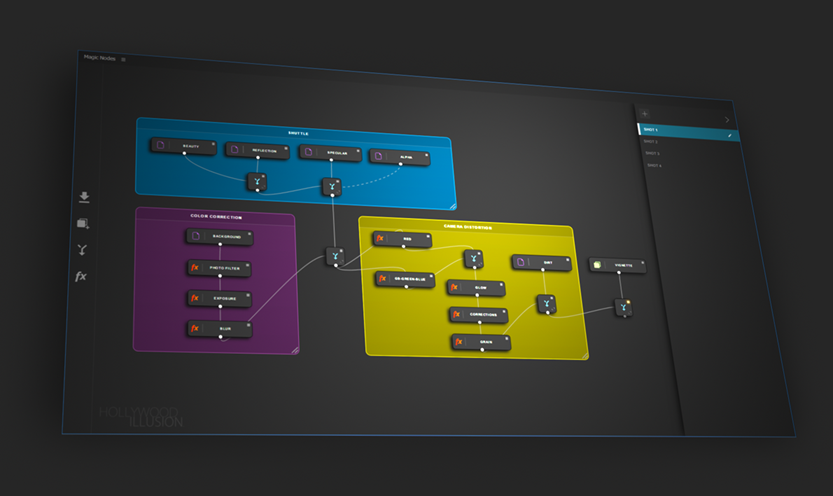
Nodes represent the basic block of any composite. A composite consists of multiple nodes connected together that allow you to manipulate and process your images. This results in a node graph that you can easily manipulate and organize to create stunning shots.
Except for dot nodes, each node in the graph corresponds to a layer in After Effect's layer stack. Thus, creating a node in the node graph will automatically create a layer in the corresponding After Effects' composition.
Nodes and layers are linked together in such a way that editing the node graph has a direct impact on the correponding After Effects' layer stack.
Example: editing the name of a node will rename the corresponding After Effects' layer. Deleting a node will remove the corresponding layer from the composition etc. (more on this in the "Interacting with nodes" section)
| Node | Description | Look |
|---|---|---|
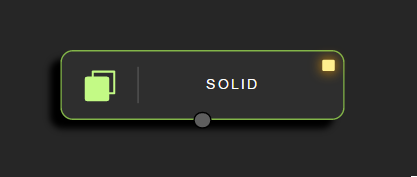
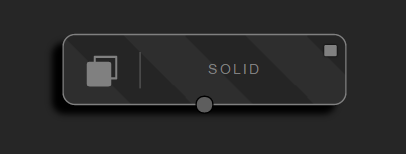
| Solid | Corresponds to an After Effects' solid layer (white by default) |  |
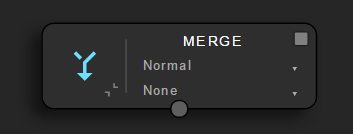
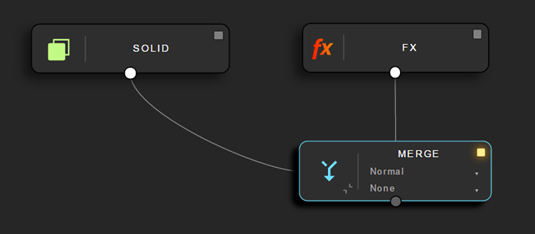
| Merge | Blends multiple inputs through blending modes and track mattes. The available blending modes and track mattes are the same as After Effects' ones. Merge nodes have three inputs, one for the background, one for the foreground, and one for a track matte. First, the background is processed, then the foreground is applied, and finally the track matte. As a result, the track matte is applied to the result of the background and foreground composite. Merge nodes contain special effects called Layer Composite. These effects allow multiple layers to be composited within a single layer, and thus makes node compositing possible in After Effects. Three Layer Composite effects are automatically added to a merge node, one for each input. |
 |
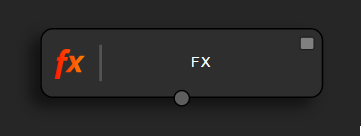
| FX | Allows to add and group effects to your composite. Although you can add effects to any node, FX nodes allow a better understanding of your compositing process. Example: users may want to group all the color correction related effects inside of an FX node, so they can easily be spotted on the node graph. Like the merge nodes, a Layer Composite effect is automatically added to a FX node. |
 |
| Footage | Refers to an image, video or sequence of images imported in the After Effects project. | 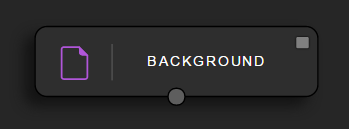 |
| Composition | Corresponds to an After Effects' composition. |  |
| Dot | Improves the readability of the node graph by bending connection paths between nodes. A dot node does not alter the input image. | 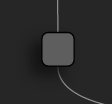 |
| Graph | Corresponds to a Magic Nodes graph that has been imported into the current graph (see section "Graphs List Panel"). | 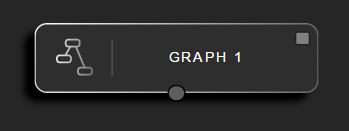 |
Nodes can be added directly with the toolbar on the left side of the screen or using shorcuts (see section "Shortcuts Summary").
The toolbar lets users import footage or compositions into the node graph, create solid nodes, merge nodes and FX nodes.
Each node has a viewer option. When activated, it displays the render output of this node, and thus, the composite of the graph up to this node. This option allows to easily visualize in one click the result of the composite at any step of the graph.
Only one node of the graph can have the viewer option activated at any time.
To activate the viewer option on a node, do one of the following:
Clicking on a node automatically selects the corresponding After Effect's layer, allowing you to perform all common operations on it (add effects, transform etc)
To select multiple nodes, do one of the following:
When hovering a node, a menu appears on top. It contains 3 options:
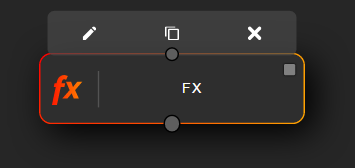
| Option | Description |
|---|---|
| Edit | Changes the name of the node and its size/duration/frames per second when applicable (only for solids, compositions or footage). For solids and node groups, you can also edit the corresponding color. Editing any of these properties also affects the corresponding After Effects' layer. |
| Duplicate | Clones the node (also duplicates the corresponding After Effects' layer). |
| Delete | Removes the node from the node graph (also removes the corresponding After Effects' layer) |
To connect nodes, do one of the following:
To disconnect nodes, do one of the following:
When cloning nodes, Magic Nodes duplicates the corresponding After Effects' layers, as well as the connections between the nodes. Thus, if you clone a subgraph, you obtain an exact copy of the original subgraph.
To clone one or multiple nodes, do one of the following:
Disabling nodes allows you to bypass the impact of a node in the pipeline.
To disable or re-enable a node, select the node and press D. After being disabled, a node will have a striped look :
To delete a node, do one of the following:
Magic Nodes offers a couple of ways of navigating inside of the node graph.
To pan the graph, press Shift, click on an empty space of the graph, and drag the mouse pointer over the workspace.
To zoom in/out, move the mouse pointer over the area you want to zoom in/out, and use the mouse wheel.
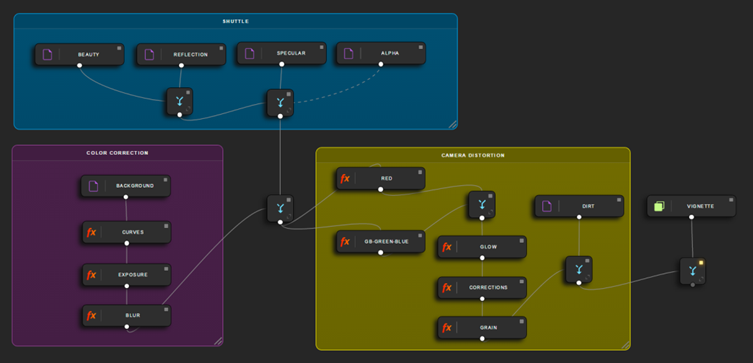
Nodes can be gathered using nodes groups. It adds a background box behind the nodes that visually group them:
You can set a title and choose a color for the group using the edit button on the top right of the box. Below are listed all the interactions with node groups:
| Action | Description |
|---|---|
| Add a node group | Use Ctr/Cmd+drag to create and extend the area you want to be covered with the group. |
| Resize a node group | Click on the resize icon on the bottom right of the box, and drag to resize. |
| Rename | Click on the Edit button (on the top right of the box) and click on the current name section to rename the group. |
| Change the color | Click on the Edit button (on the top right of the box) and click on the color section to pick a new background color. |
| Delete a node group | Click on the Delete button (on the top right of the box). |
| Moving a group and the nodes contained within it | Click in an empty space inside of the node group and drag it |
| Moving a group without moving the nodes contained within it | Ctrl/Cmd + click in an empty space inside of the node group and drag it |
| Add a node into the group | Move the node inside of the group or extend the group to overlay the node |
| Remove a node from the group | Move the node outside of the box, or shrink the group to uncover the node. |
Starting from v2, Magic Nodes offers a way for creating multiple node graphs inside of an After Effects project file.
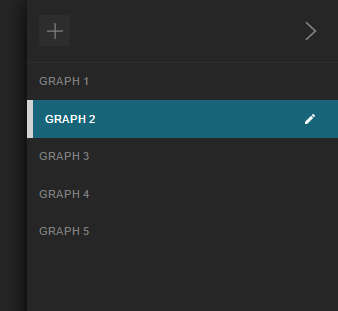
The side panel on the right side of the Magic Nodes window allows you to create and browse all the graphs in the current project file:
To open the side panel, click on the little icon on the top right of the window:

The panel lists all the graphs that were created within this After Effects project.
To create a new graph, do one of the following:
To select a graph, just click on the item in the list you desire, and the graph will automatically be loaded.
An item in the list can also be dragged into the current graph. This will create a particular node that contains the result of the corresponding graph:
The settings of each graph can be edited through the little edit icon:

| Input | Description |
|---|---|
| Name | The current title of the graph. |
| Width | The current width (in pixels) of the viewer. |
| Height | The current height (in pixels) of the viewer. |
| Framerate | The current number of frames per second of the viewer. |
| Duration | The current total number of frames for this graph. |
The panel contains a button to delete the graph. Use it with caution!
| Shortcut | Description |
|---|---|
| Ctrl+I | Imports a footage (composition, image, sequence of images or video) |
| Ctrl+Y | Creates a solid node (same shortcut as After Effects) |
| F | Creates an FX node |
| M | Creates a merge node |
| 1 | Activates the render output of this node |
| Backspace or Delete | Deletes the node |
| Ctrl+A | Selects all the nodes |
| D | Disables a node |
| K | Connects two selected nodes |
| Ctrl+K | Disconnects two selected nodes |